


- Collaboration Custom "Silver Fang"

I've been into Zoids for a long time, and the König Wolf has been a source of awe since I first laid eyes on it. So, it's no surprise to anyone that, upon seeing the old photos of the Silver Fang at WF, it became this mystical holy grail of a kit to me. Theories flew back and forth for years, about whether the kit had been official, displayed by a fan, etc. Over the years I learned more about the Smack Zoids concept art from Dengeki Hobby Magazine, and realized that it had been based on the concept art displayed above. It became my goal to eventually own one of these monster wolves.
Well, sometime in the mid-late 2010s, a dedicated Zoids fan in Japan made their own Silver Fang, which was sold at Wonder Festival. This sparked a renewed enthusiasm for the crazy Zoid, but unfortunately, I didn't have the means to travel to Japan to attend the event. Still, it was good to see them 'out in the wild'.
The Endeavor To Recreate Silver Fang

 Not long after those events, an incredibly talented 3D modeler, Torrigan, began taking commissions for 3D Zoids. After a discussion he agreed to take on this massive project to create a brand new Silver Fang. Torrigan did 100% of the 3D modeling work, making an absolutely stellar version that was perfect down to the very last detail. He was incredibly patient and helpful throughout the entire process.
I tried my best to provide artistic concepts on detail design, proportions, etc. Torrigan went above and beyond everything asked for, and created the best iteration of Silver Fang I could have ever hoped for! Every detail was elaborated, every request taken 5 steps further than it could've been. I'll go more into the design process as we cover the different distinct elements.
Around the same time that this project was in early development, RPZ, admin of Zoids Universe inquired about commissioning a Silver Fang as well~ We decided to join our projects together and co-fund the 3D modeling cost of the kit. RPZ also helped us decide on some of the key elements. It was great working with another Zoids fan, nevermind such a talented customizer!
A Bigger Badder Wolf
One thing I knew I wanted for Silver Fang was a fiercer face design. I love the overall armor shapes of the Zoid, but wasn't as keen on the incredibly pinched nose, which more closely resembled a pelt aesthetic to me. So, we decided to go with more robust proportions, and this direction paid off big time in the final design.
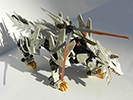
- Out Of The Box

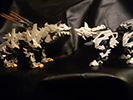
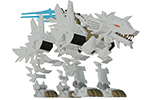
This was my first look at Silver Fang out of the box. It looked so bulky compared to the normal König Wolf! Partially because it wasn't fully attached yet. The proportions would be stretched due to the articulation details, making this wolf significantly larger. Not all pieces were attached for this photo, but I wanted to include it so people could see what it looked like before all that paint!
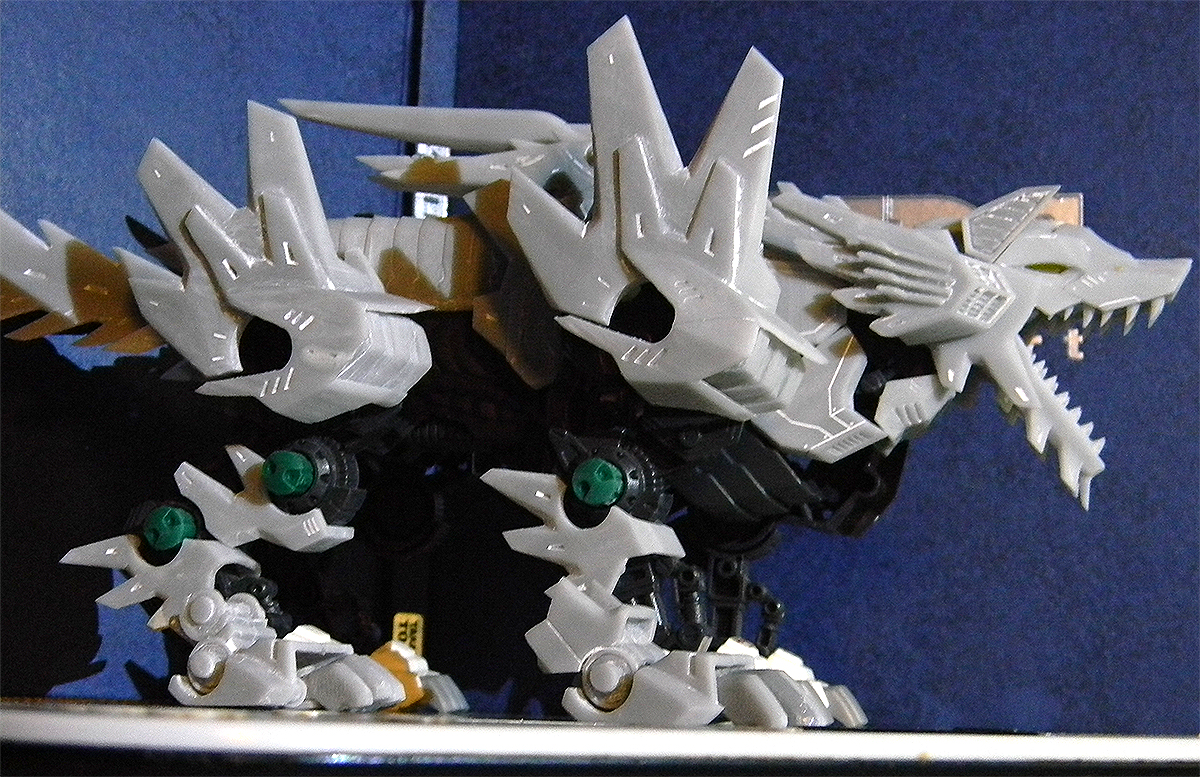
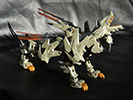
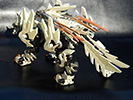
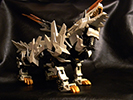
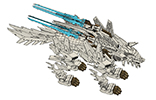
Silver Fang: The Final Product

"A huge wolf-type wild body had been captured by a Western Continent Ruins Investigation team."
"The name was written in characters not used on the Western Continent, and this language was also used to write the research data that Dr. Baba left behind. Even to this day, up to 40% of the original data has not been analyzed. It was equipped with an unknown technology as well, with rumors abound of technology from the Eastern Continent. For instance, the possibility that it was equipped with Magnezer equipment, built into the cutting-edge design."
"Even so, there wasn't a single person who could control it, so it became known as a phantom Zoid. Dr. Baba, who was developing the Silver Fang, went missing along with the completed machine while over on the Eastern Continent."
Gimmicks And Explanations
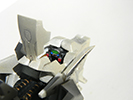
- Head

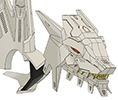
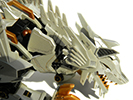
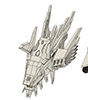
I explained this a bit above, but one thing we really wanted for Silver Fang was a more robust head. Thicker, and more ferocious looking. This panned out well from a design scheme, and we ultimately decided to add extra detailing to make the face not feel so empty. Originally, this detailing was intended to extend to the rest of the body design, but since we were developing two versions already, we decided to err towards a more simplified version that would be better differentiated from the second (exclusive) kit.
What we didn't anticipate is that the final appearance with all of the armor attached would make the head look incredibly tiny compared to the rest of the body. Mainly because of that big towering shoulder armor. So, we made a (slightly nervous) decision to size the head up dramatically, and it came out amazing. The mass compared to a normal König Wolf is shocking, and it turned out looking much more balanced against the armor.
It's worth noting that the head is scaled with articulation in mind. Extending the neck of your wolf will make it look more proportionate.
Ears


Silver Fang has the ittiest bittiest ears, and as an added bonus, they're attached to ball joints. They can't rotate very far, but can lean forwards, backwards, or tilt inwards or outwards for added expression.
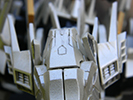
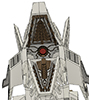
Cockpit


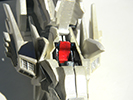

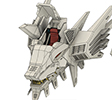

Another step of genius design by Torrigan is the cockpit! This features a ton of detail crammed into a tiny space. Unfortunately, in my inexperience, I didn't make sure everything was flush during the building process, so there's a pretty significant gap in the head. I'll fix this at a later date when I have more experience! I'd also love to go back and redo the paint work here, to better match the 3D concepts.
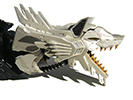
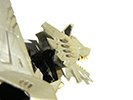
Jaws and Mouth Detailing
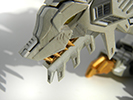


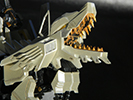
During the head design process, Torrigan decided that Silver Fang could use some added mouth detailing. We ended up with this glorious gaping maw. I was blown away by the insane amount of detail that went into this! The teeth and mouth use DecoArt's Emperor's Gold, black acrylics, and Molotow Liquid Chrome pens.
The mouth featured a pretty neat little lense at the back, but I found this kept the jaw from closing all the way, so I trimmed off the back half of it and left the front half in tact.
Head Articulation


My work station was so messy you couldn't tell what the photos were, so badly edited out backgrounds ahoy! Anyway, Silver Fang used a large double-jointed Revoltech ball joint for the head and the base of the neck. The armor hid these amazingly well, and surprisingly didn't interfere with the actual rotation of the joints.
While articulating the neck I decided to cut below the pipes on the standard wolf neck, and use the front part to place the joint instead. The Silver Fang head attaches around that front part. I went with this choice because I felt that being able to keep the pipes moving with the neck would look a little more authentic, provide better movement, and be more secure than drilling into the resin.
Painting was that one ounce too many, and made the head assembly too heavy for the neck joint. I managed to find a single Revoltech joint in my entire collection, a bronze one, that would still be strong enough to hold the head. So, I wouldn't recommend revo joints for parts this heavy.
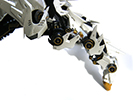
- Front Legs

I must confess, one of my biggest regrets with this review is not getting more articulation photos. This kit used ball joints on the inside of the 'elbow disc', which allow the leg to extend outwards a bit, or rotate forwards and backwards.
- Lower Legs


Silver Fang has a different lower leg design, armor included, from the standard König Wolf. While figuring out how to make this work, Torrigan decided to make a custom joint system for the 'wrist' of the Silver Fang. This part hooks into the circular attachment at the bottom of the standard König Wolf's leg, and leads into a second rotating joint just behind the foot. This not only gives the wolf more articulation, but also makes it stand noticeably taller than the normal wolf. This is the only part of the kit that required modifying the base kit, as the leg pipes on the fronts of the legs had to be removed to accomodate the new armor.
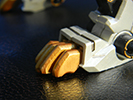
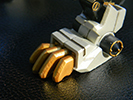
- Paws

 10
10

When we started designing the paws I knew I wanted something similar to the motorized Liger Zero, where the toes were on a small rail that allowed the claws to spread out or tuck together. Torrigan decided to design a crazy, but awesome joint setup where the toes would hook around a bar, and glasp the actual claw segment at the top and bottom. This meant the toes could move in every direction! The down side is that the connecting parts are extremely fragile, so he sent a few spares just in case!
- Rear Legs


The rear legs include quite a bit of additional armor, including plates on the backs of the legs. This fell off a couple times in the process of taking photos and I forgot to put it back on, so sorry about that! But the rear legs had a huge amount of articulation work done on them. Aside from rotating at the thigh, the 'knee' also bends forwards and backwards, as does the heel. The lower leg armor for the rear leg includes an additional hinge joint from the Silver Fang kit, and the claws of the back legs are just as articulated.
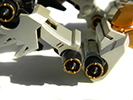
- Caps

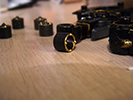
For this particular Silver Fang I decided to use some of the Death Metal Black caps from the Zoids Wild franchise. These fit motorized Zoids well, and the caps were painted with rings of gold with the tip of the center spike also painted.
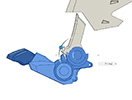
- Body

For the body I used a basic Krylon Gloss Black primer, and unfortunately the detailing just did not photograph in any of the plain daylight photos. So, have a blurry WIP photo! Molotow Liquid Chrome pens were used for the silver detailing, and the lighter black was a custom mix of standard acrylic paint. Fun Fact: Without legs, the head is heavy enough to tip the entire body forward!
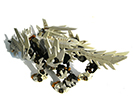
- Back


Silver Fang includes a layer of additional back armor to add bulk to the Zoid. This lays directly over top of the standard König Wolf, with the lower part attaching over the on/off switch (which I removed for my kit) and the front half attaching over the round peg that normally attaches the fan plate. It's glued down for a little more stability, and features a ridge of spines going down the back.
The upper back includes slots for the larger spikes on either side. A nice added detail is that the kit included an additional back spike for the middle. You could place the Magnzers here, or choose to leave them out, but still cover the peg with a spike that blended seamlessly with the surrounding parts.
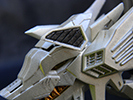
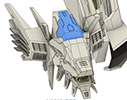
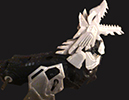
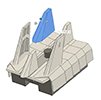
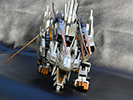
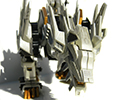
- Magnezer Housing

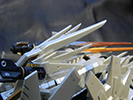


The Magnezer Housing is a large tower that sits between the shoulder blades. The Magnezers attach to these parts, and on either side, it has movable fins that can be arranged in whatever configuration you prefer. The shallow joints weren't the most stable with the super glue I used, so I need to reinvestigate this later. This unique setup allows for the Silver Fang to "bristle", and it adds so much character.
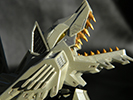
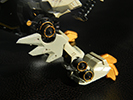
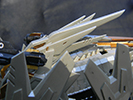
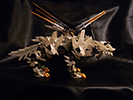
- Magnezers


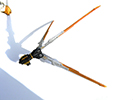
In the original concept art the Silver Fang had a set of Magnezer blades. This iteration of Silver Fang also includes these weapons. The magnezers are well made, and can open up or close, as well as actually rotate. The base attachment allows them to flip forwards or backwards. Because they are long, thin resin parts, warping can occur. There are guides online for fixing this if you experience it with your own resin kits in the future~
I painted the blades first with silver, then went over the to-be-gold parts with a bright pink color. The pink was then painted over with DecoArt's Emperor's Gold, which gave it a super rich, warm gold that is distinctly different from the rest of the golds used on the kit. Light shines on the edges and turns them gold, while shadows turn a deep orange.
- Tail
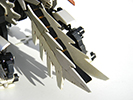
The tail pieces attach to the sides of the tail, leaving the top exposed. Choosing which joint to securely anchor slightly changes the orientation of the armor to give more control over how 'fluffy' it looks. Be forewarned, the pegs are rather fragile. You may need to glue them. An additional layer of fluffy armor is glued to the flat plane that sets above the tail, pulling together the whole armor look.
- Final Thoughts

It has been a long, long journey to obtain this amazing model kit. It was my first completed full-size Zoid custom. An immense amount of work, a lot of collaborative effort, and plenty of dreaming. Torrigan created something that I never thought I would be able to own, and I am forever grateful for that. This is my dream Zoid. The penacle of my holy grails, and if I could only choose a single Zoid to take with me, at this current moment, this would be it.
And it's not the last! Aside from a second, personal version of Silver Fang, Torrigan has been creating numerous Zoids works on commission. Some of these will be debuting in the near future, so keep an eye out!
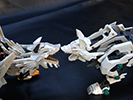
- Size Comparisons

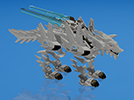
- Final Product Photos


- Development Images


- Credits

Torrigan: Design Work, 3D Modeler, 3D Printing, Sanding & Epoxy Work
 Keshion (Admin): Co-Funder, Jointing, Painting, Detail/Art Concepts
RPZ: Co-Funder, Design Consultation & Input
Paints Used:
- DecoArt Dazzling Metallics "Oyster Pearl" (Main Armor)
- DecoArt Dazzling Metallics "Emperor's Gold" (Details)
- Krylon's Gloss Black Primer (Frame)
- Krylon's Gloss White Primer (Main Armor)
- U.S. Art Supply acrylics (Body Detail, Blade Base Color)
- Molotow Liquid Chrome Pens (Details)
Joints Used:
- Revoltech Ball Joints (variety)
- Lego Joints (Leg-to-body attachment)
3D Fileset Download:
As Silver Fang has always been a dream of mine, I really wanted to see that others could obtain this amazing kit as well. Please feel free to download these files and print your own monster wolf! These files are the 3D model only, with no supports added. There are a LOT of parts, so gear up! Also be advised these parts are fragile. This kit is not recommended for beginners. As a final note, while we are offering these files strictly for personal use, please be respectful of the hard work that went into this project, and refrain from using it for profit or for secondary products based on the files. Printing for friends for no profit is fine~ Thank you!
