


Zoids Chaotic Century: Japanese DVD Vol. 3
 Volume 3 covers episodes 11 ~ 15. The war between the Republic and the Empire is increasing in ferocity. In the middle, Van faces up against one of the Empire's secret weapons: The young pilot Raven, and his black Organoid, a Zoid that looks strangely similar to Zeke. The battles continue, and the gravity of his situation only worsens.
Episode List:
Episode 11: The Fog at Iselina
Episode 12: The Black Organoid
Episode 13: The Battle of Cronos
Episode 14: Wake Up! Zeke!
Episode 15: Deploy the ZG!
Bonus Features:
Concept Art: 47 Pages
- Concept Art
 |
 |
 |
 |
1: Guylos Empire Regent Prozen (Full Body) |
2: Guylos Empire Regent Prozen (Expressions) |
3: Helic Republic General Krueger (Full Body & Expressions) |
4: Helic Republic Commander Ford (Full Body & Expressions) |
 |
 |
 |
 |
5: Organoid Shadow (Full Body & Expressions) |
6: Organoid Shadow (Comparison With Raven) |
7: Organoid Shadow (Joints) |
8: Episode 11: The Fog of Mount Iselina Rosa (Full Body & Expressions) |
 |
 |
 |
 |
9: 8: Episode 11: The Fog of Mount Iselina Elder (Full Body & Expressions) |
10: Prop Concentration Mirror |
11: Mt Iselina Plateau Area |
12: Mt Iselina General Area |
 |
 |
 |
 |
13: Path Along Cliffs |
14: White Colony |
15: Alpine Plants |
16: Valley of Fog |
 |
 |
 |
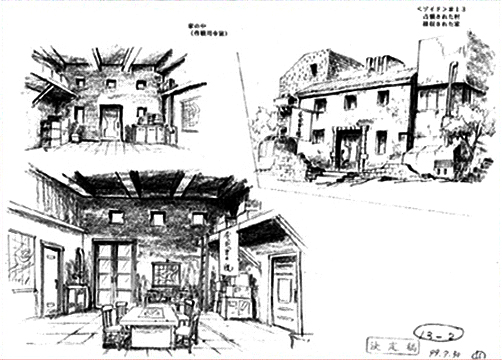 |
17: House of the Village Chief |
18: Raven's Gear Goggles For Protection |
19: Occupied Village |
20: In Occupied Village House That Was Taken Over |
 |
 |
 |
 |
21: Fort Kronos |
22: Fort Kronos Inside |
23: Inside Fort Kronos Rooms |
24: Wasteland |
 |
 |
 |
 |
25: Tin Drum |
26: Inside of Hangar Large Space |
27: Republican Army Maintenance Personnel (Full Body & Expressions) |
28: Guylos Empire Schwarz's Associate (Full Body & Expressions) |
 |
 |
 |
 |
29: Republican Army Genius Scientist Dr. D with Broken Bone (Full Body & Expressions) |
30: Van's Republican Made Suit (Heat Resistant) Thermal Suit |
31: Mount Kronos After the Self Detonation of the Summit |
32: Wala Colony Panoramic View |
 |
 |
 |
 |
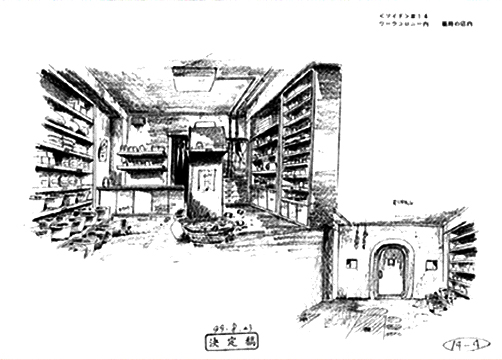
33: Wala Colony Pharmacy |
34: Wala Colony Pharmacy Store Interior |
35: Republican Army Camp |
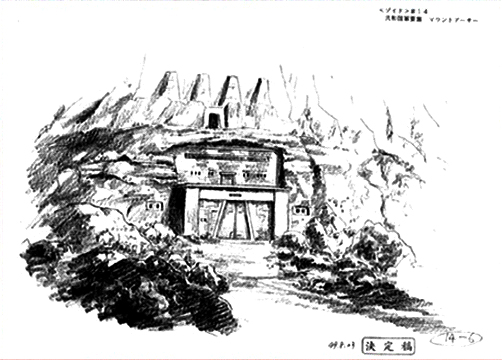
36: Republican Army Stronghold Mount Osa |
 |
 |
 |
 |
37: Zoid Maintenance Area |
38: Road Around Mount Osa Crater |
39: Types of Medicine |
40: Gustav Manipulators |
 |
 |
 |
 |
41: Moonbay & Fiona Female Smocks |
42: Van Male Smocks |
43: Mount Osa Interior Operation Room |
44: Underground Hangar |
 |
 |
 |
|
45: Inside The Wala Colony Internal Building |
46: Underground Passage Lower Tunnel |
47: Wala Colony Hut (Full View) |
Images courtesy of Falcarius!
